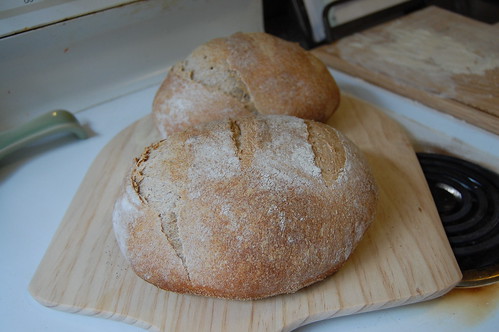
Rustic Bread

rustic bread from hamelman's bread

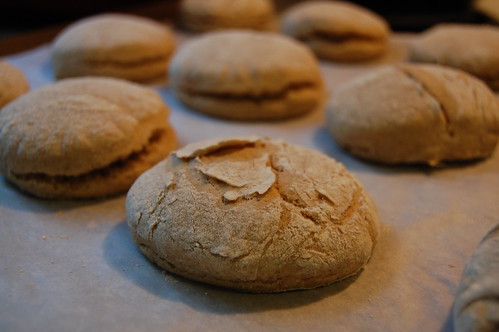
Saturday I made 6 loaves of bread. No really! And I was basically at it all day and into the night. But I really wanted to make the most of the day I had free so I packed in a lot of work. This one is the Rustic Bread from Jeffrey Hamelman’s Bread. It’s mostly a white bread with a bit of whole grain thrown in as well. I used both whole wheat and rye flours.

There are a number of challenges when baking artisan bread from home. The main one for me is my oven. I have an oven thermometer in there, but even so it’s about impossible to get it to stay at the temperature you want. The temperature likes to shoot sky high and then it’s really hard to get it to come back down. I’ve even found myself with the oven door standing open. And, I don’t know if this is true of other electric ovens, but the only time the top element comes on is if I’m broiling. So instead of getting an even amount of heat from the top & bottom, it gets all the heat from the bottom. So I have to watch like a hawk and keep adjusting the temperature to try and keep the bottom from burning before the top browns. See what I’m talking about?
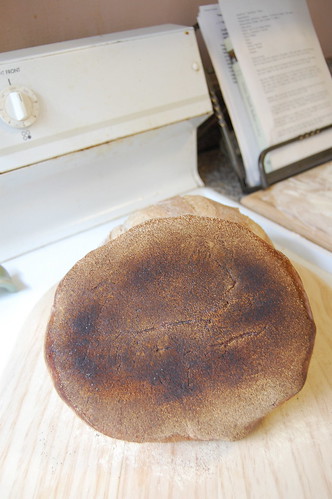
rustic bread bottom

A touch darker than I’d like, but the char flavor is minimal and it was worth it to get the top right. Another thing my oven doesn’t have is an automatic steamer for the first part of the baking process. The method I used last time to achieve this was to preheat a cast iron pan in the oven along with my baking stones. When I put the dough in to bake, I poured hot water into the pan and used a spray bottle to spray the sides of the oven. I repeated spraying the sides of the oven a couple of times in the first 10 minutes of baking. I didn’t get good lift on those loaves and ended up with a practically burnt bottom and pale top. So this time, I tried something else. When I put the loaves in, I misted the top of each with the spray bottle, and check 3 or 4 ice cubes into the bottom of the oven. Then that’s it. Way easier and I think it worked better.
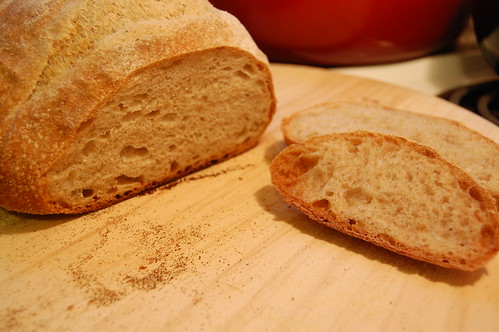
rustic bread from hamelman's bread

I found these loaves took a lot less time to bake than the 35 or so minutes given in the recipe. Looking at the comments in The Fresh Loaf post I linked to above, maybe I didn’t leave the dough wet enough. But the loaves registered somewhere between 200 and 205 degrees, and the bottom couldn’t take any longer in there so out they came. All in all, I’m really happy with these.
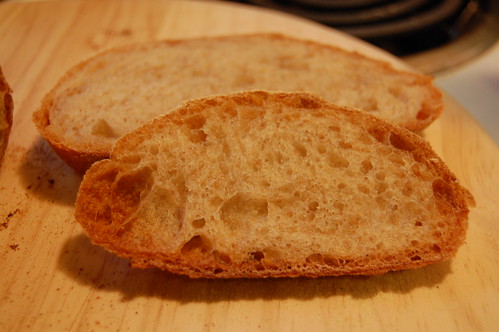
rustic bread from hamelman's bread

Submitted to Wild Yeast Blog’s Yeastspotting feature.

Cajun Tofu & Jackfruit “Carnitas”

I’m usually too lazy to cook something that involves this many pots & pans. So it should be considered a treat. This is the Cajun Tofu from Yellow Rose Recipes. It’s actually baked, not fried, so it’s good for you and shit. The potatoes are your basic red & purple potatoes, chopped up, tossed with olive oil, salt & pepper and roasted til they’re done. The spinach is just sautéed with garlic, onions, and a pinch of red pepper flakes. Also in olive oil. And look, there’s one of those sourdough biscuits! By the way, the leftover tofu on one of the biscuits made an amazing little sammich.


cajun tofu potatoes spinach biscuit

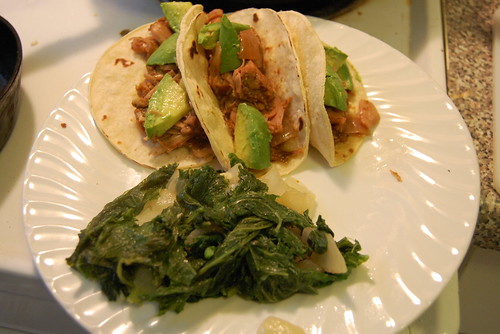
I saw this recipe for Jackfruit “Carnitas” Tacos a while back and knew I’d eventually get around to trying it. I was right! I ate them with sautéed mustard greens, taking advantage of the opportunity of Kevin being out of town to enjoy some bitter greens. I’m post the recipe of what I did because it deviates a bit from the one linked to above. The spice amounts are approximate as I just eyeballed it and starting tossing stuff in there. I felt like it was a little acidic, so a vegan cheese or sour cream might be especially nice. I just “suffered” with avocado. 

jackfruit carnitas tacos

Jackfruit “Carnitas” Tacos

  • 2 20 cans young green jackfruit in brine rinsed and drained
  • 1 7oz can mexican green sauce
  • 1 11oz can whole tomatillos drained
  • ½ large onion chopped
  • 2 cloves garlic minced
  • 1 teaspoon chile powder
  • 1 teaspoon cumin powder
  • ½ teaspoon black pepper
  • ½ teaspoon smoked paprika
  • ¼ teaspoon cayenne pepper
  • ½ teaspoon oregano
  • 1 teaspoon fresh lime juice
  • 18-24 small corn tortillas
  • 2 avocados

Drain & rinse the jackfruit throughly. With your hands, press the moisture out of each piece & add it to the crock pot.

Toss all of the spices in the crockpot with the jackfruit. Stir around until jackfruit is coated.

Add onion and garlic to the pot. Dump in green sauce. Add tomatillos squeezing between your fingers to bust up as you add them. Stir everything around.

Cook for 7-9 hours on low. Before serving, smash jackfruit with a spoon. It’ll shred into stringy pieces. No need to be thorough, just want to smack the chunks down a bit.

Dry fry tortillas in a cast iron or other heavy pan until they get some brown spots on each side. Spoon some jackfruit “carnitas” into a tortilla all soft taco like, squeeze a little lime juice on top, toss on a few pieces of avocado and then add whatever it is you like to add to tacos.

Sourdough Cast-off Biscuits

If you have any experience at all with sourdough starter, you will know that you need to remove some starter each time you feed it, unless you have the ability to store gallons and gallons of the stuff. You can give it to a friend to develop their own starter, toss it, or make something with it. There are a few recipes floating around for pancakes, waffles, etc. But I choose this Fluffy Sourdough Biscuit recipe because it was the most versatile for me and, bonus, it was already vegan.

I’ve made these twice now, both times with a rye starter. Since I mixed it with all purpose flour, the rye didn’t really come through in the biscuits. But the flavor of these things is amazing. You can see in the recipe, there isn’t much by way of flavoring except for the starter, but they taste like they’re full of butter. Also, true to sourdough form, they hung out in a bag on my counter for a few days without a hint of getting stale. They didn’t rise as much as I’d like, but they were in no way dense.

fluffy sourdough biscuits

My First Sourdough

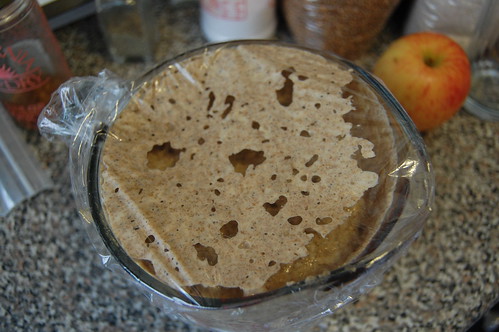
Rather than doing what most people do when they want to try baking sourdough bread, I just jumped right in and developed my own starter. And, despite the fact that I have no idea what I’m doing, it worked! I mean, I can read a book as well as anyone else. But my practical bread building experience is almost nil. The starter took an extra day or two beyond what The Bread Baker’s Apprentice had set as the standard schedule. But then, there’s really nothing standard about developing a wild yeast starter. So I didn’t worry too much, just followed the suggestions and kept plugging away. Here are a few starter shots as I went along:

sourdough starter

sourdough starter

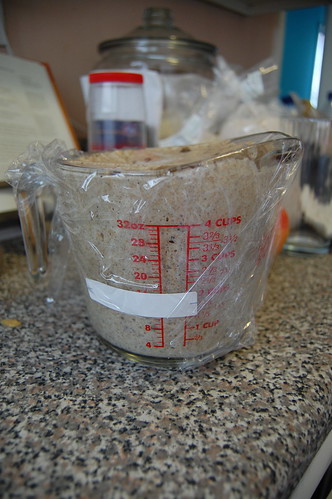
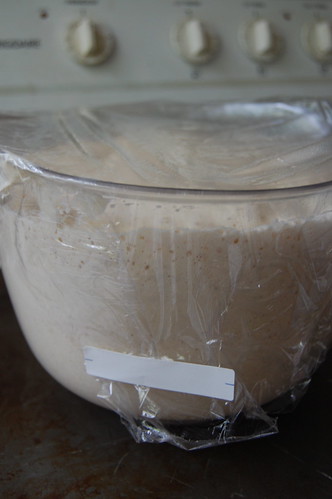
And here’s the barm. The white tape marks the beginning level. I’d say that’s some active yeast, eh?

sourdough barm

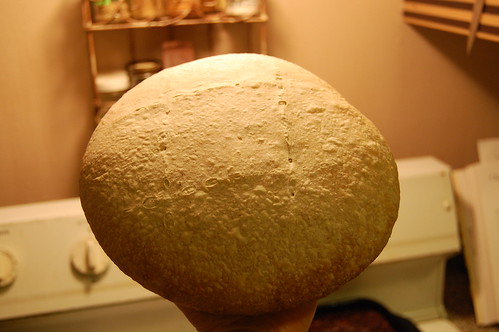
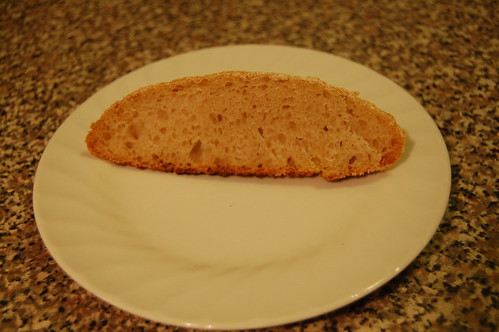
The finished loaves were far from perfect. The bottom is a bit too brown and the top not quite brown enough. I need a proper tool for the cuts in the top. (I used a box knife. No really.) I need to work on setting up my boule a bit better. Needs more surface tension. But after doing two I now have more of a feel for it. The taste seems just about right. Good sour taste. Probably could be a little more sour. But that will probably develop as the starter matures. I wish they had risen more. And I wish my oven wasn’t so sketchy. There’s no keeping an even temperature. At least I have an oven thermometer so I can keep adjusting, but I know it’s all over the place. Also, I think I had them too far down in the oven, but I needed to leave space at the top for the steaming water. Anyway, here’s a loaf and a slice:

sourdough loaf

sourdough slice

Vegan Waffle Cones & Bowls

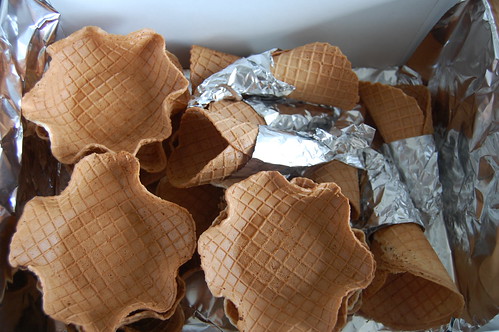
We had the perfect opportunity to work out the waffle cone maker yesterday when our friends had a vegan ice cream social at their store to celebrate the 1 year anniversary of the retail location of Cosmo’s Vegan Shoppe. The recipe we used last time turned out cones that were a little too hard. So after a bit of googling, I found one that didn’t rely on a ton of eggs and was easily veganizable. And they turned out perfect.

box of vegan waffle cones and bowls

I think there were about 16 total, and they went fast. Hey, I ate one. I’m not shy about stuff like that. No one wants to be the first at the buffet, etc. I don’t mind getting things started.

vegan waffle bowl sundae

Turnout was crazy. Seriously, who were all those vegans packing the store for at least two hours? Pretty good for one of the top 10 least veg friendly cities, eh? *cough*vegnewssux*cough* Others were taking pictures of actual people, so those should show up on the intarwebs soon enough.

Oh, yeah, there’s a recipe too! It’s adapted from the one I found here. And yeah, you do need a waffle cone maker. Oh, and in case you’ve ever wondered, you can indeed put regular granulated sugar into a food processor to make powdered sugar.

Vegan Waffle Cones

1 box SoyaToo Topping Cream
1 ½ teaspoons vanilla extract
1 ½ cups powdered sugar
1 ½ cups unbleached all-purpose flour
¼ teaspoon ground cinnamon
1 tablespoon cornstarch
Oil, for the iron

In a bowl with a whisk, whip the SoyaToo Topping cream with the vanilla until thick. Beat in the remaining ingredients to make a batter. Let the batter sit for 30 minutes.

Heat up waffle cone iron and brush with a little oil. Pour some batter in and close the lid to bake and brown. Open the iron and remove the browned batter and fold over itself, overlapping it, on a wooden cone-form into a cone. Or, throw over an upended flat bottom bowl, lightly press it to the shape, and remove when cooled enough to be firm and cool on a cookie sheet or rack.

Or, if you’re lazy, you can just get cones from Let’s Do Organic. They have regular vegan and gluten-free sugar and cake cones and bowls. You can even get a party pack that includes bowls and sprinkles.